Exam groups and exam schedules are how the exam committee organizes exam activities: grouping related exams, choosing the question bank, setting when the exam runs, and then choosing who is allowed to take it.
Quick Workflow
The safest order of work usually looks like this:
- Create an exam group.
- Create an exam schedule for each subject or session.
- Save the core schedule details first.
- Continue to the exam settings.
- Set the timing, technical rules, and participant rules.
- Review everything before the schedule opens.
Exam Groups
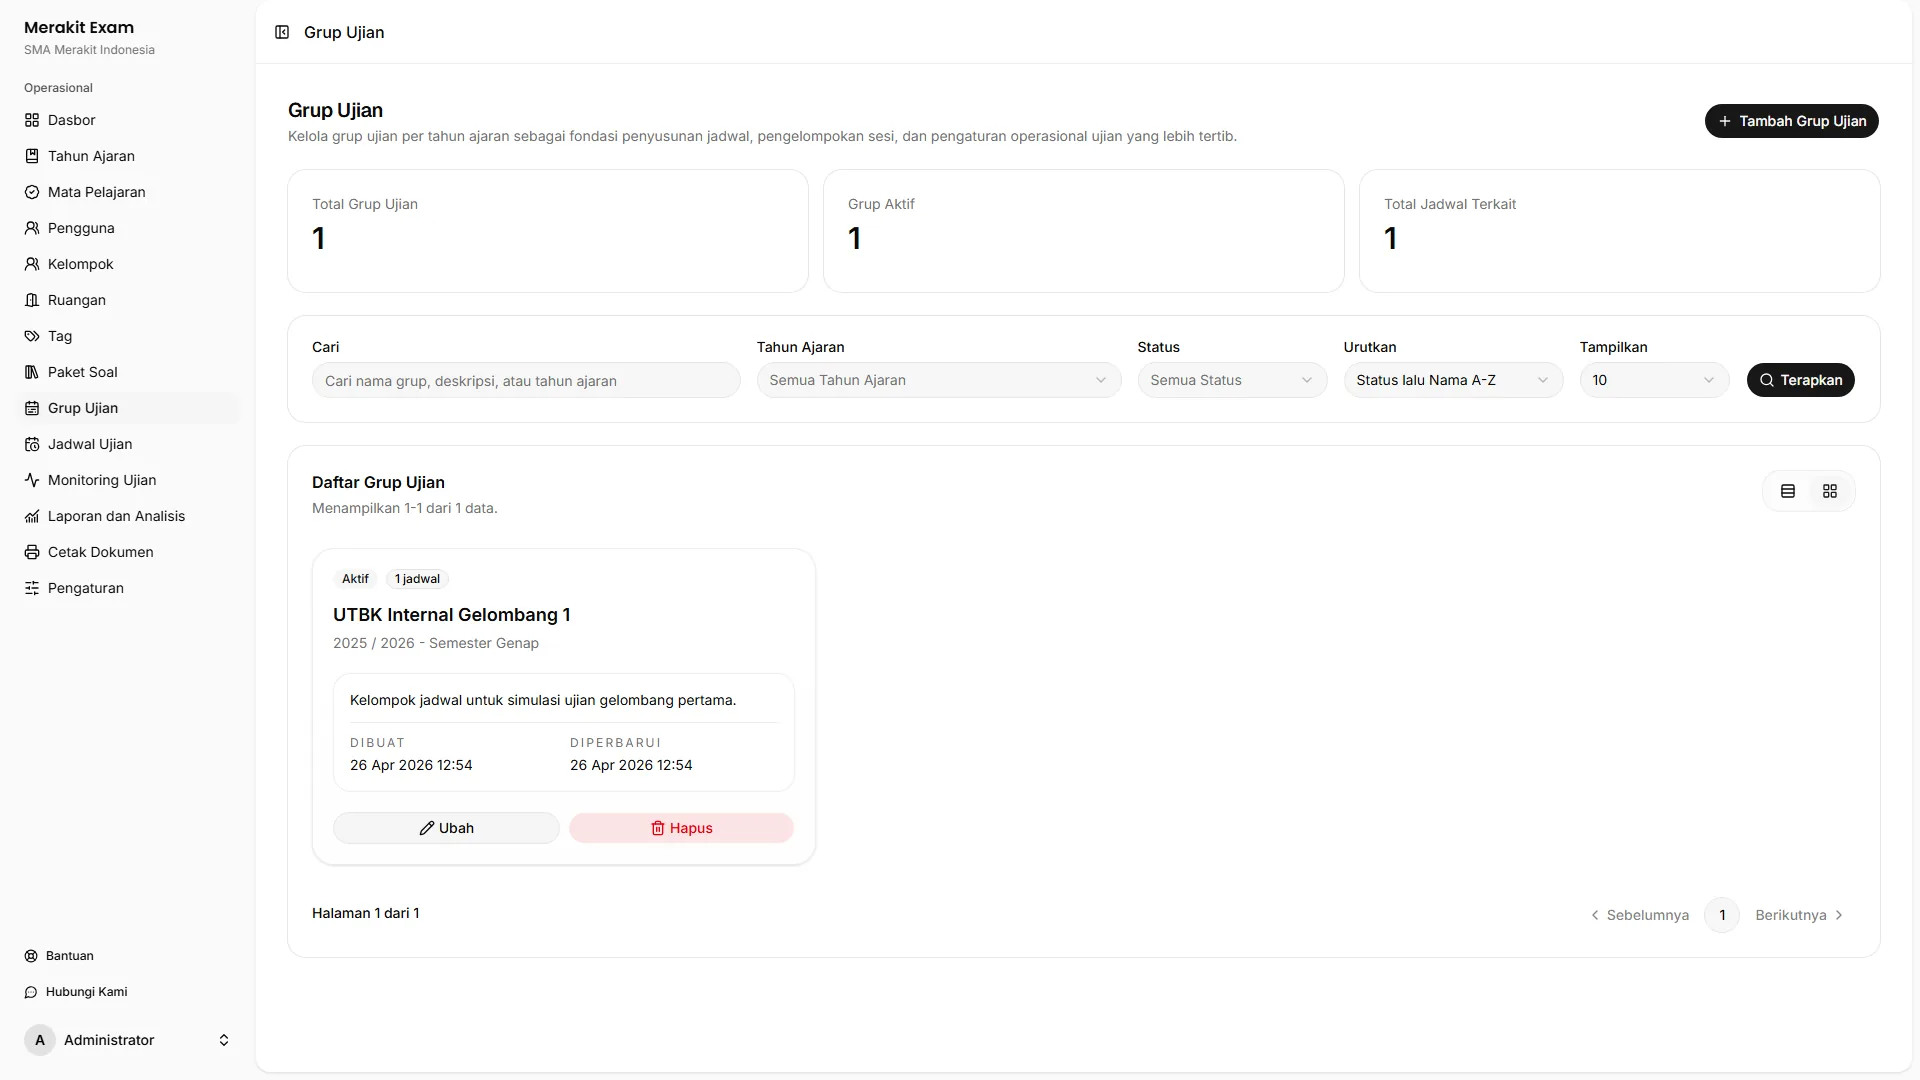
An exam group (“Grup Ujian”) lets the committee collect several schedules under a single exam event.
Examples of exam groups:
- Mid-Semester Assessment
- End-of-Semester Assessment
- Main try-out
- Make-up exam
- Internal selection
The exam group form contains the following fields:
- Academic year
- Exam group name
- Description
- Active or inactive status
Use group names that operators can easily recognize. If one event covers many subjects, place them all in the same group so they are easier to read in monitoring, reports, and the schedule list.
Core Exam Schedule Details
Once the group is ready, create an exam schedule from the Exam Schedule (Jadwal Ujian) page.
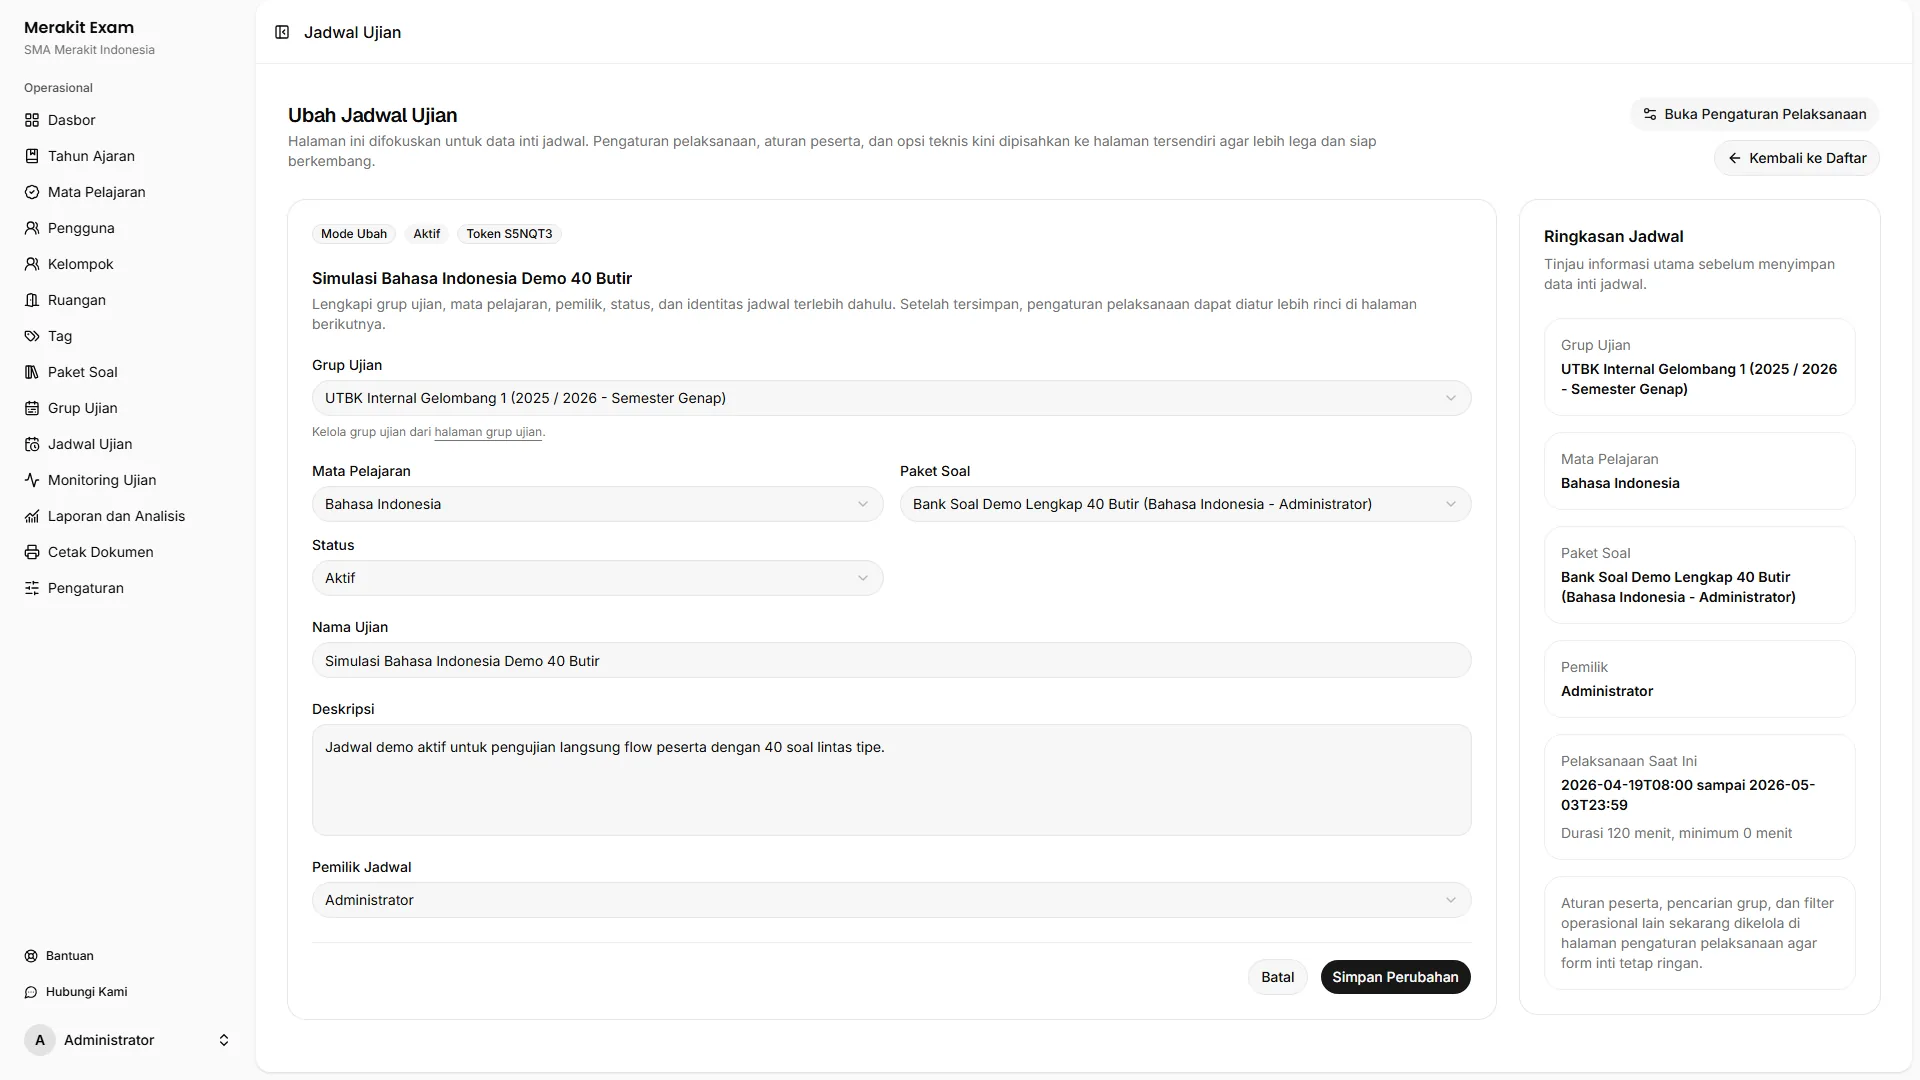
Fill in these core schedule details first:
- Exam group
- Subject
- Question bank
- Schedule status
- Exam name
- Description
- Schedule owner
Important notes:
- Each schedule must be linked to exactly one question bank.
- Teachers (“Pengajar”) can only use schedules they own.
- When an admin creates the schedule, the schedule owner can be selected from the user list.
- After a new schedule is saved, the system takes the committee straight to the exam settings page.
When Is a Schedule Ready?
Saving the core details does not yet make the schedule ready for participants. The core details only establish the schedule’s identity and its basic links.
After that, the committee still needs to set:
- Start and end time
- Exam duration
- Technical exam rules
- Rules for which participants may take the exam
This separation is intentional: it keeps the core form lightweight and easier to work with once there is a lot of exam data.
Exam Settings
The exam settings page is used after the core details have been saved.
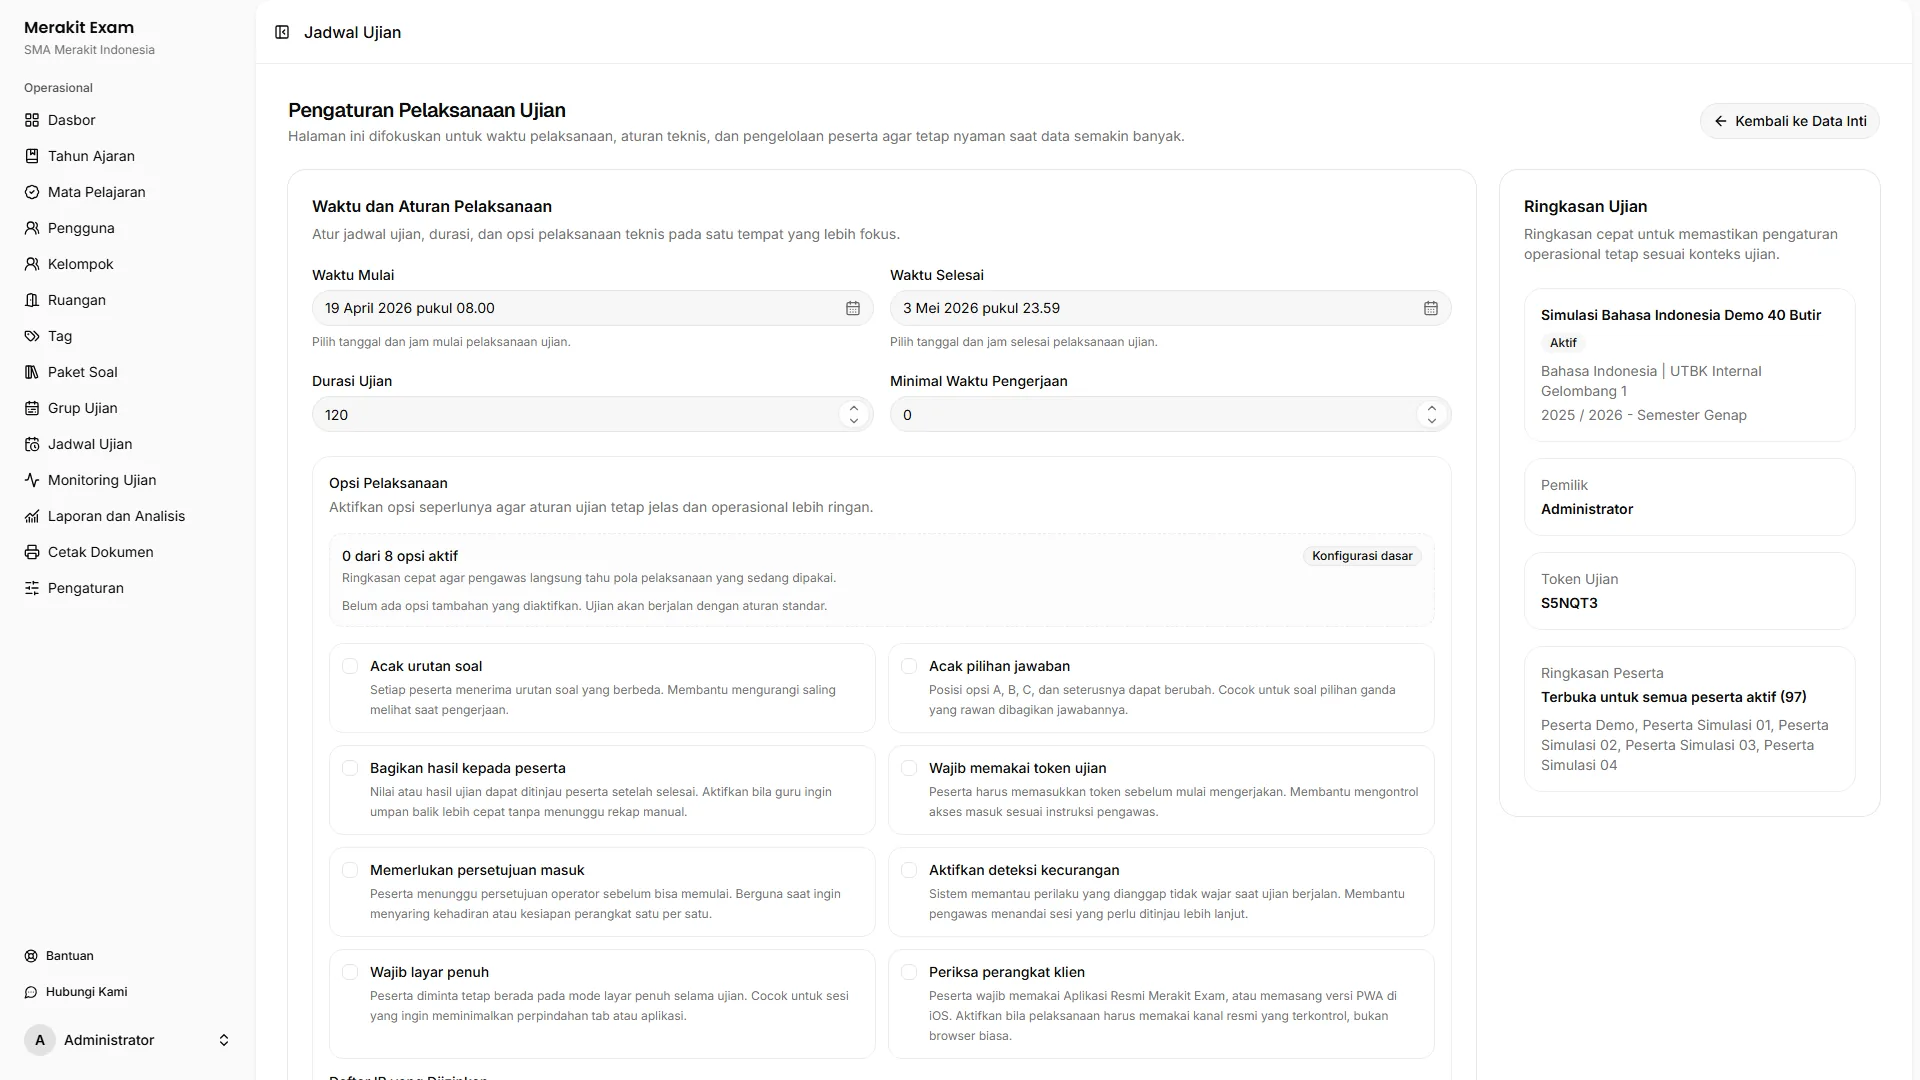
This area typically covers four main decisions:
- Exam period
- Duration and minimum working time
- Technical and security options
- Participant rules
Exam Period
The exam period determines when the schedule can be opened.
The committee sets:
- Start time (
Waktu mulai) - End time (
Waktu selesai)
Choose a period that matches the school calendar. Leave time for device checks and operator preparation before participants begin signing in.
Duration and Minimum Time
The duration setting determines how long participants may work on the exam.
Available fields:
- Exam duration (
Durasi ujian) - Minimum working time (
Minimal waktu pengerjaan)
Operational notes:
- The default duration for a new schedule is 90 minutes.
- The default minimum time is 0 minutes.
- The minimum time cannot be longer than the duration.
- A minimum time is useful when participants should not be able to submit too early.
Exam and Security Options
On the settings page, the committee can enable any combination of the following options as needed:
- Shuffle question order
- Shuffle answer options
- Share results with participants
- Require an exam token
- Require entry approval
- Enable cheating detection
- Require fullscreen mode
- Check client device
- Allowed IP list
Not every exam needs every option. Enable only what fits the context of the exam.
Practical Recommendations
| Context | Commonly Used Options |
|---|---|
| Supervised classroom exam | Entry approval, token, fullscreen |
| Exam in a school computer lab | IP restriction, entry approval, fullscreen |
| Flexible try-out | Minimum time, share results, shuffle questions |
| Exam that requires an official channel | Check client device |
Participant Rules
Participant rules determine who can see and take the schedule.
The system supports combinations of:
- Participant groups
- Individual participants
- Tags
- Excluded participant groups
- Excluded participants
- Excluded tags
This means the committee can create rules such as:
- all participants in a particular group
- plus a few individual participants
- plus participants with a particular tag
- then excluding specific participants or tags if needed
If Participant Rules Are Left Empty
If a schedule has no participant rules at all, the system treats the schedule as open to all active participants.
Therefore:
- leave the rules empty only if every active participant is truly allowed to take the exam
- review the rules again before the exam opens
- for exams per class or per session, it is best to still use a group or tag filter
Include and Exclude
Use include rules for participants who are allowed to take the exam. Use exclude rules to remove specific participants from the included set.
Example:
- Include
Kelompok XII IPA 1 - Include tag
Susulan - Exclude participants who are not taking part in the session
This approach helps when the committee does not want to build the participant list one by one from scratch.
Managing Participants on the Settings Page
The participant rules page is designed to handle large amounts of data, so the committee can:
- search for groups, participants, or tags
- select entries page by page
- view the entries already selected
- remove specific selections without starting over
If a participant you are looking for does not appear, the cause is usually one of the following:
- the participant account is inactive
- the participant has not been added to the correct group
- the tag has not been assigned
- the participant falls under an exclude rule
Schedule Owner
The schedule owner identifies the teacher or person responsible for the exam.
Benefits:
- makes filtering the schedule list easier
- limits teacher access to their own schedules
- supports monitoring and reports by person in charge
For institutions that divide work among several teachers, make sure the schedule owner is correct before the exam runs.
Schedule Status
Each schedule also has an active or inactive status.
Use the status:
- Active (
Aktif) when the schedule is ready for use or being prepared for an exam - Inactive (
Tidak Aktif) when the schedule is not in use yet, has been postponed, or is only saved as a draft
This status does not replace the time check. An active schedule still needs a correct exam period.
Checklist Before the Schedule Opens
Before participants start the exam, check the following:
- The exam group is correct.
- The subject is correct.
- The selected question bank is final.
- The schedule owner is correct.
- The start and end times are correct.
- The duration and minimum time follow your policy.
- Technical options such as token, entry approval, fullscreen, or IP restrictions have been configured.
- Participant rules match the intended group or session.
- The schedule does not clash with other activities.
Checklist When Participants Have Problems
If a participant cannot see the exam or cannot start it, check the following in order:
- Make sure the schedule is still within its active period.
- Check the schedule status.
- Make sure the participant is covered by an include rule.
- Make sure the participant is not caught by an exclude rule.
- If entry approval is used, check monitoring to see whether the participant is still waiting for approval.
- If a token is used, make sure the token was shared correctly.
- If IP restrictions or client checks are used, check whether the participant’s device and network meet the requirements.
Summary
Exam groups organize exam events. Exam schedules represent one specific exam session. After the core schedule details are saved, the committee continues to the exam settings to configure timing, duration, security, and participants.
If this workflow is kept tidy from the start, monitoring, reports, and post-exam documents will be much easier to manage.